UOL- Fourier Transform Infrared Spectrometer (FTIR) SOP
Standard Operating Procedure
Introduction
The Thermo Scientific iS10 FTIR is an advanced instrument used for identifying and quantifying materials through infrared spectroscopy. This SOP provides a basic overview of the instrument’s operation; a more detailed explanation of its features and capabilities can be found in the user manual.
Safety
- All students must wear safety glasses when working in the lab.
- Never leave this equipment operating unattended.
- Mix all chemicals in a fume hood.
- All chemicals, solutions, and standards must be stored in a sealed container. The container must be labeled with chemical(s) name and concentration, operator/user’s name, hazards, and date of storage. Confirm storage location with the lab manager.
- All chemical containers must be sealed when not in use.
- All unwanted material must be placed in an appropriate container. The container must be labeled “Unwanted Material.” The label must include the chemical(s) name and concentration, the operator/username, contact information, and hazards. If you have questions regarding labeling unwanted materials, see the sign posted above the unwanted materials table in the Senior Lab.
- Only pure water can go down the drains.
Equipment Description
- Spectral Range: 7,800 – 350 cm-1
- Wavelength Precision: Better than .01 cm-1 at 2000 cm-1
- Spectral Resolution: Better than 0.4 cm-1, non-apodized
- Collection Speed: 0.16 – 2.5 cm/s
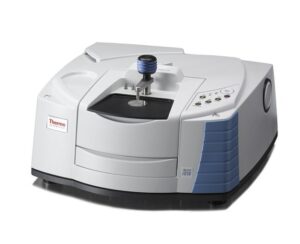
Figure 1: Thermo Fischer Nicolet iS10 FTIR system.
Procedures
- The power to the FTIR should be on and should remain on even if the computer is turned off. Do not ever turn the FTIR off. If it is for some reason powered down, turn on the FTIR (there is a switch on the transformer)
- When the FTIR is ready, the LED for the laser should be on.
- If the computer is turned off, turn it on.
- Open the OMNIC software.
- If using the Attenuated Total Reflection stage (ATR), select “DuraScope Accessory, 1 Bounce” in the “Smart Accessory Change” window. If using transmission FTIR, select the “transmission” option.
- Click the Experimental Setup button (“Extp Set”)
- Select your experiment properties.
- Typical number of scans = 32 (more will give more averaged, smoothed spectra, and less will give noisier spectra)
- Typical resolution = 4 (more will leave out more spectra detail and less will give more detail)
- Typical data final format = Absorbance or Transmittance
- Typical time between backgrounds = 120 min.
- Click OK to close the experiment properties window.
- Choose an appropriate control sample.
- Place the control sample on the Attenuated Total Reflection stage (ATR) or in/on another appropriate sample holder.
- If using the ATR with solids:
- Place the sample over the window.
- Turn Screw 1 (above the sample), raising or lowering the pin until it touches the top of your sample. Do not tighten this screw; it is only meant to compensate for samples of varying height and the load is measured at the base of Screw 2.
- Tighten Screw 2 (at the corner of the sample) until the load gauge reaches 8. Do not exceed a load of 9 and keep in mind the repeatability of your experiments may be affected by the load.
- Click the Collect Background button (“Col Bkg”) and then OK. If the Preview Data option is selected in the Experiment Setup window, then you will see single scans of spectra. To collect the data, you have to select “Start Collection” on the top right of the OMNIC window. Otherwise your background will be collected automatically. You can watch the progress on the bottom left corner of the OMNIC window.
- Once it is finished, you may add the background to the window by clicking Yes.
- Now you may put your sample of interest in or on your stage and click collect Sample (“Col Smp”).
- Once the scan is finished click add to widow to view the spectra.
- Repeat steps 14-15 for as many samples as you wish. If using ATR, be sure to clean the stage between each sample. You may need to test a new background periodically and, if you see significant peaks you will want to repeat the collection of a background.
- To save you have several options:
- To save singular spectra click the spectra in the display window (when selected it will turn red). Then click “file” and “save as”. Form here you can save it as a OMNIC spectra (.spa), which will allow you to use the analytical tools in the OMNIC software later, or as a comma separated text file (.csv) to be read with another program such as Matlab or Excel.
- You may also save a group of spectra as a group spectra file (spg) by using ctrl-w to select all spectra and then click “file” and “save group”.
- You may be able to identify your substance by clicking “analyze” and “search”.